In a galaxy far far away….Well, not too far away! Welcome, today I’m sharing how to make these adorable Star Wars Valentines cards. If you have kids who love Star Wars, these are so fun to make for classmates! For the past few years I have made valentines for the boys’ classmates. This year I wanted to do something a little more themed for their classes.
I joined five other bloggers this week to give you lots of Cricut Valentines inspiration! Check them out below!
Both my kindergartner and preschooler are super into Star Wars. My husband introduced the series to them about a year ago and they were immediately hooked! We have star wars sheets, blankets, toys…all the movies, and now Star Wars Valentines cards for their friends!
These cards were fairly simple to make once I figured out how to do them. I did the trial and error so you don’t have to!
Star Wars Valentines Cards
- Cricut Explore Air 2
- Card Stock
- Mod-podge
- Cricut Pen
- Dum Dum Lollipops
How to Make Star Wars Valentines Cards
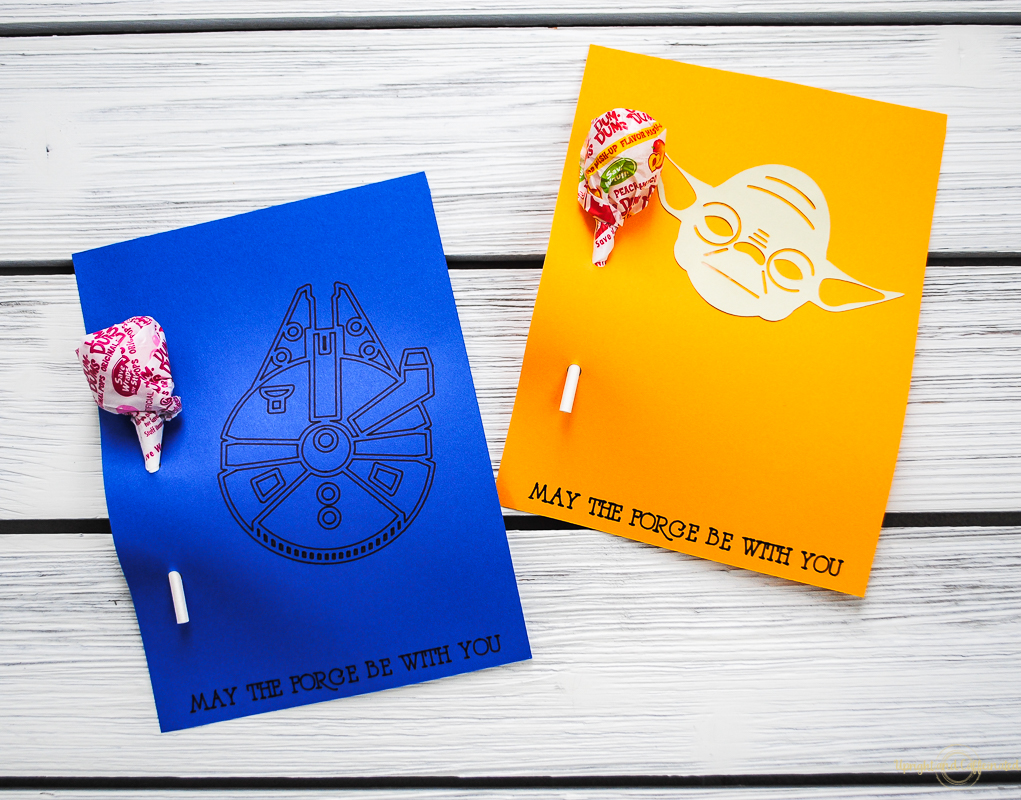
First of all, since the images are property of Disney, you will need to purchase the images of the Millennium Falcon and Yoda through Cricut Access. They also have images of R2-D2, C3Po, Chewbacca and an AT-AT walker!
Once you have purchased the image, you can begin to design the card. I used 8.5 x 11 card stock for this project, but 12 x 12 would have been easier to work with.
PIN IT ⇓
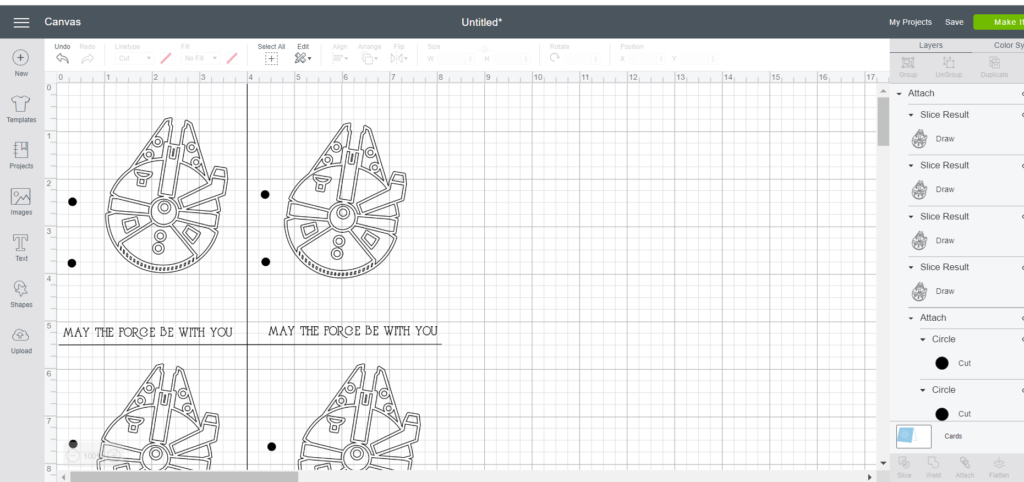
To cut the paper into quarters, use the score line (find it under shapes) and then change it to a cut line after you have it in place. To do this, look at the top of the toolbar in Cricut Design Space. Where it says “linetype” click the arrow to choose “cut”. Once you have your lines in place, you can type whatever greeting. For these cards, I stuck with the classic…. “May The Force Be With You”. I used the “duplicate” button on the top right of Design Space to copy the text. 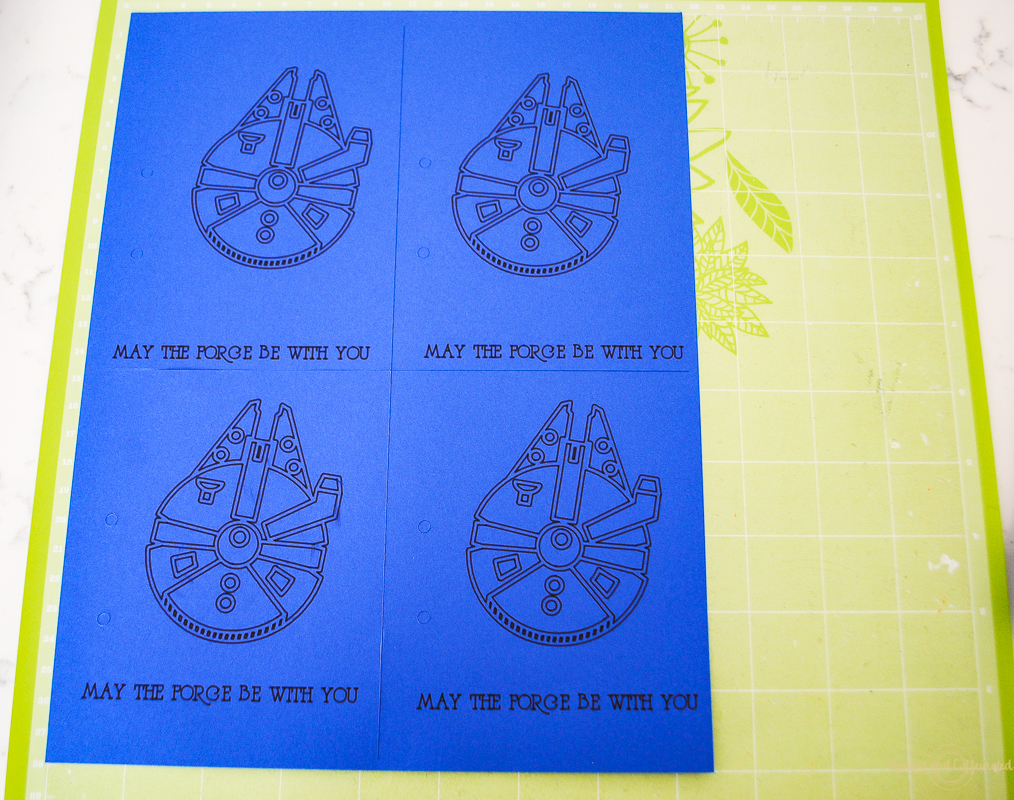
Next, add the holes for the lollipops. This is super simple! Just add a circle and manipulate it to the size you want. Use that duplicate button to repeat it. I put two holes on each card so the lollipop threads through the top hole and bottom hole and stays put. 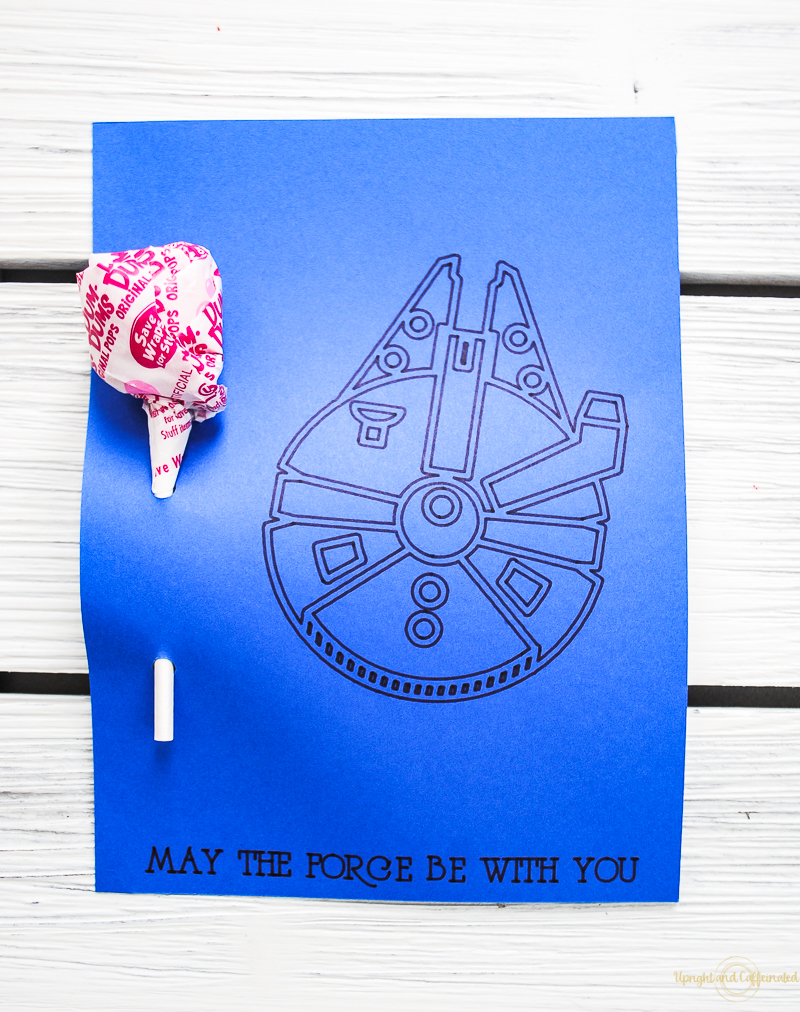
I used two different techniques for the images. For the Millennium Falcon, I used the “draw” feature in Design Space. These cards were easily completed by cutting and drawing at the same time. To differentiate cut or draw; highlight the image on the right-hand side of Design Space then go up to “linetype” and click the arrow, choosing draw. My Cricut easily drew the words, the Millenium Falcon and then cut the paper and the holes!
To do the Yoda heads, I cut and drew the cards without the Millennium Falcon image. Then I cut the Yoda heads separately on light green paper.
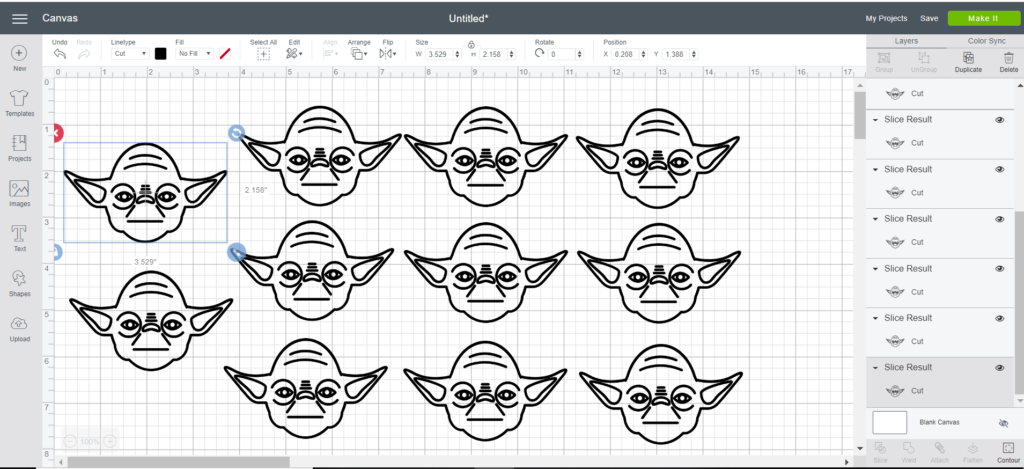
Once the cards were cut and the Yoda heads were cut, I simply used Mod-Podge to glue the heads to the cards. Use matte Mod-Podge for card stock and the Mod-Podge is invisible! 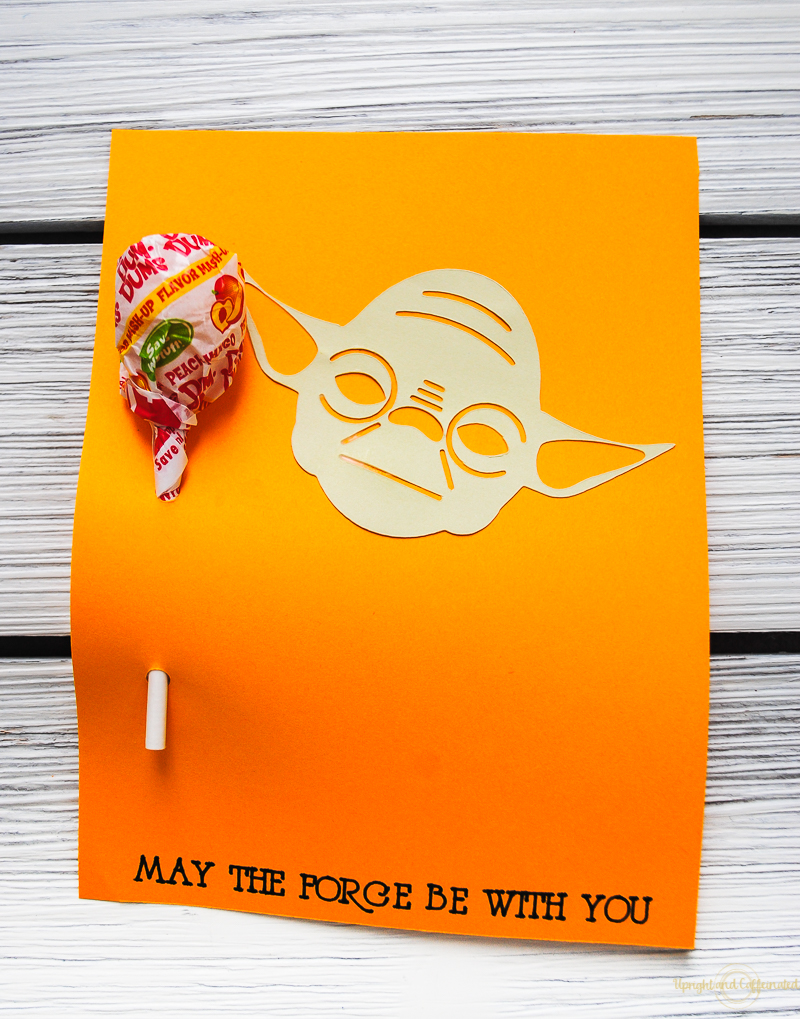
Finally, I put the lollipops in the top hole and then out the bottom hole! Perfect, right?! Here’s a little tip: if your grocery store has candy by the pound, get the dum dums there rather than buying a bag. First of all, this is usually less expensive. Secondly, you don’t have to buy a large quantity if you don’t NEED that much. I only needed 25 dum dums and it was less than $3.
I love how these cards turned out and I know my kids’ classes will love them as well. It is always fun to make homemade Valentines cards and having a Cricut make it SOOOOOOO easy to make homemade cards! 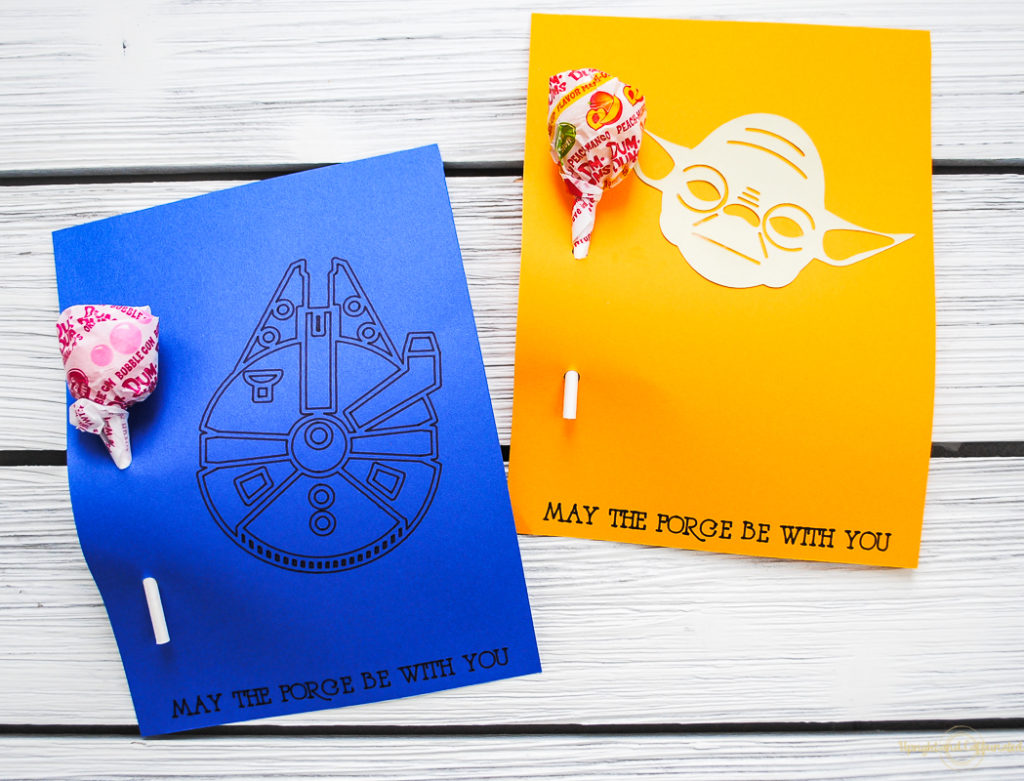
Now let’s see what my blogging besties have made for Valentine’s Day with their Cricut machines:

DIY Valentine’s Day Sign / Patterned Paper Heart Banner (Print Then Cut Tutorial) / Be Still My Heart T-Shirt / Star Wars Valentine’s Cards / I Love You More than Coffee / Emoji Valentine’s Day Shirt


These are so cute….perfect for Valentine’s Day and Star Wars lovers!
Adorable! My favorite thing when I was in grade school was getting fun Valentine’s from classmates! I would have loved one with a treat attached!!