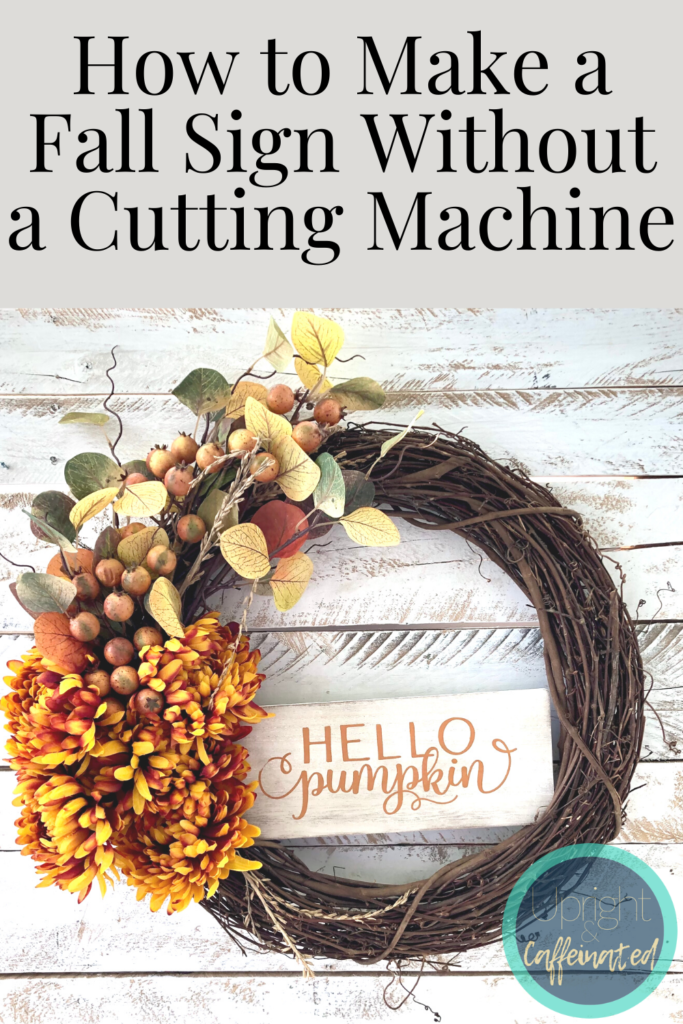
Can you feel the cooler air? Are the leaves starting to change colors? It is Fall, Y’all! One of my favorite times to change out my decor is at the beginning of fall, and today I am going to show you how to make a fall sign without a fancy cutting machine.
Grab all the supplies to make this fall sign HERE
Let’s face it- cutting machines (like a Silhouette or Cricut) are expensive. Then you have to add on the cost of the vinyl, transfer tape, and oh ya- you have to be able to navigate a complicated computer program. If you don’t have the time or money for all that, I have a much better solution! Have you heard of Chalk Couture? If not, START HERE.
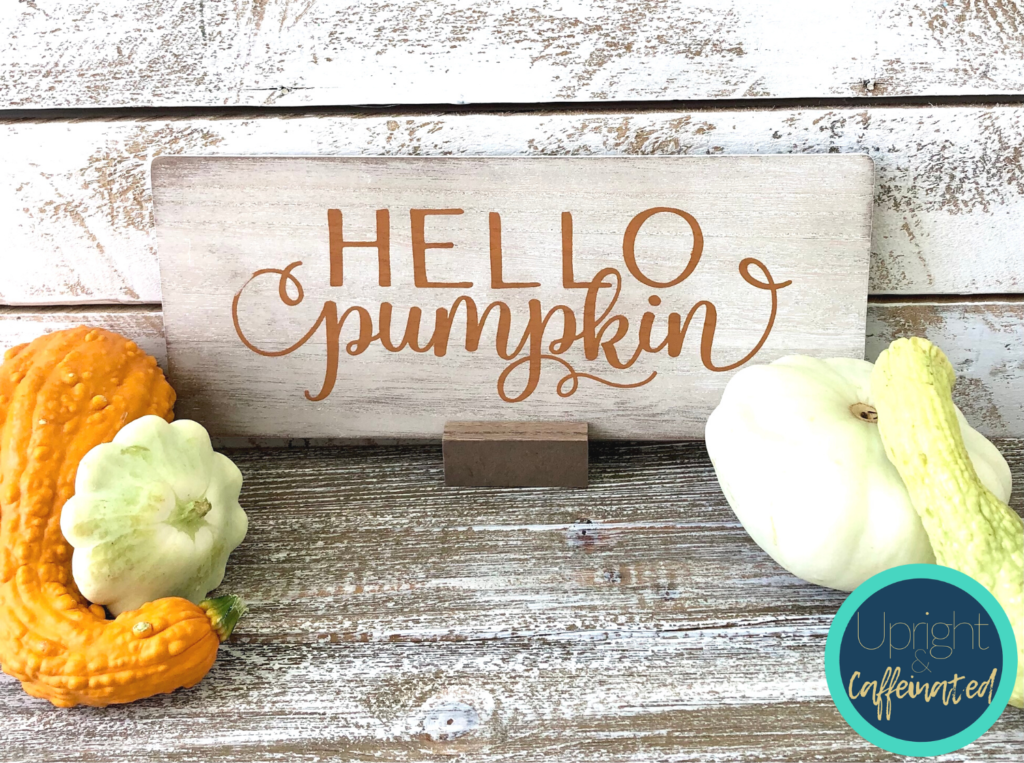
With Chalk Couture reusable, self-adhesive stencils, you can create beautiful signs over and over! This is GREAT if you want to create signs for an Etsy shop or craft fairs. It took me a matter of minutes to create this Hello Pumpkin sign. Although this is cute on it’s own, it looks even better added to a Fall wreath (keep scrolling down to see)!
Here’s how to make a fall sign without a cutting machine
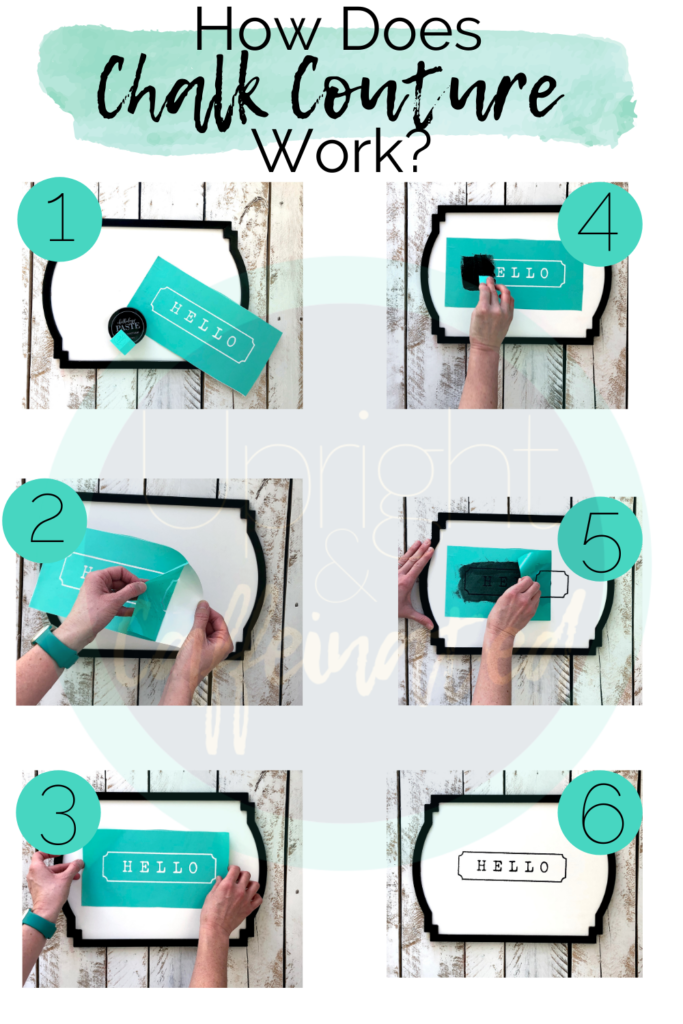
Simply peel the stencil (called a transfer) from the backing paper. Place it onto your surface. Use a squeegee to apply chalk paste. Remove the transfer. THAT. IS. IT.
The great thing is that you don’t need to get on a computer and create a file or convert a jpg to an svg. Chalk Couture makes TONS of beautiful and on-trend designs. Check them out HERE.
WANT TO LEARN MORE ABOUT CHALK COUTURE? JOIN MY FREE CRAFTING COMMUNITY.

Did I mention the chalk paste is removable from most surfaces? That means you can easily change out seasonal decor! 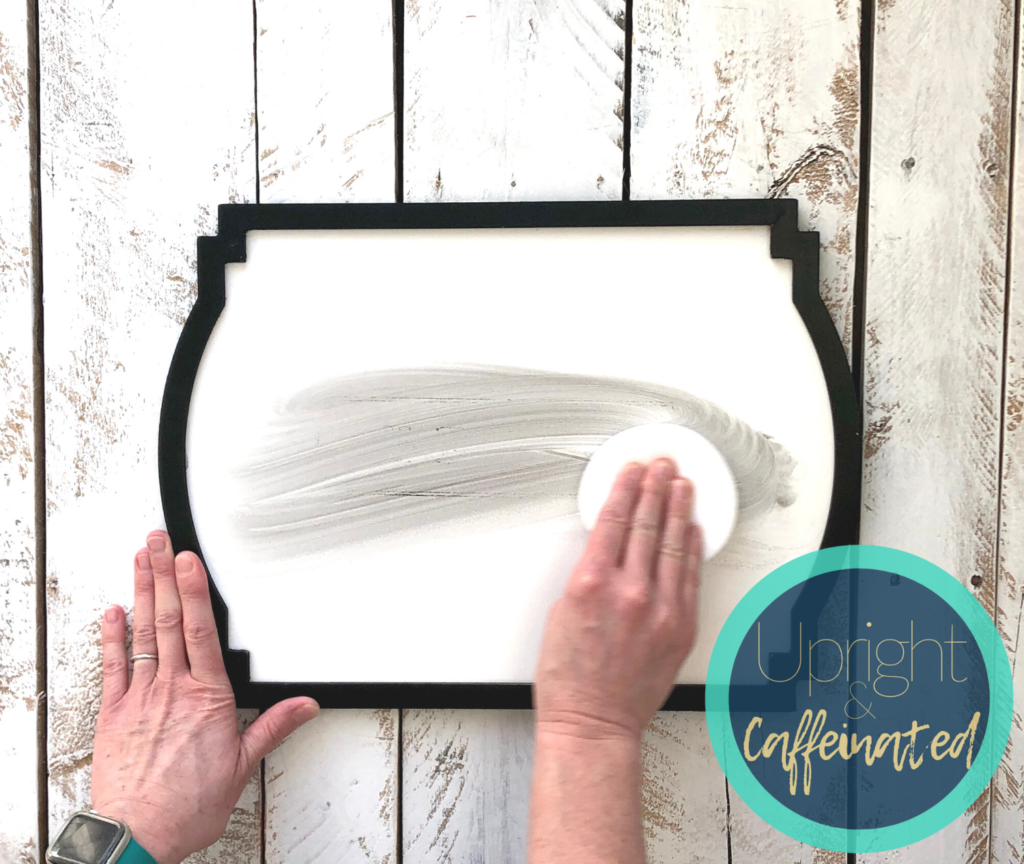
Caring for your stencil is simple and easy (no special cleaning products are necessary) and they can be used over and over again. All you need to do is wash your transfer under cold running water and wipe with a wet board eraser on both sides until the paste comes off. Lay the transfer sticky side up on a towel and wipe the sticky side with a disinfectant wipe. Once the transfer is dry, you can place it back on the backing paper to store until you need it again.
![]()
Here’s how I added the sign to a fall wreath. Doesn’t this look beautiful? I mentioned that this only took a couple of minutes (including washing the transfer). Check out the video below to see EXACTLY how easy this is!
Doesn’t that look easy? I’m telling you- it is that easy! Don’t forget, you can grab all the supplies to make this project HERE.
Want to get 40% off Chalk Couture supplies?
You can get a HUGE discount on products if you join as a designer. Click HERE to sign up!
PIN IT