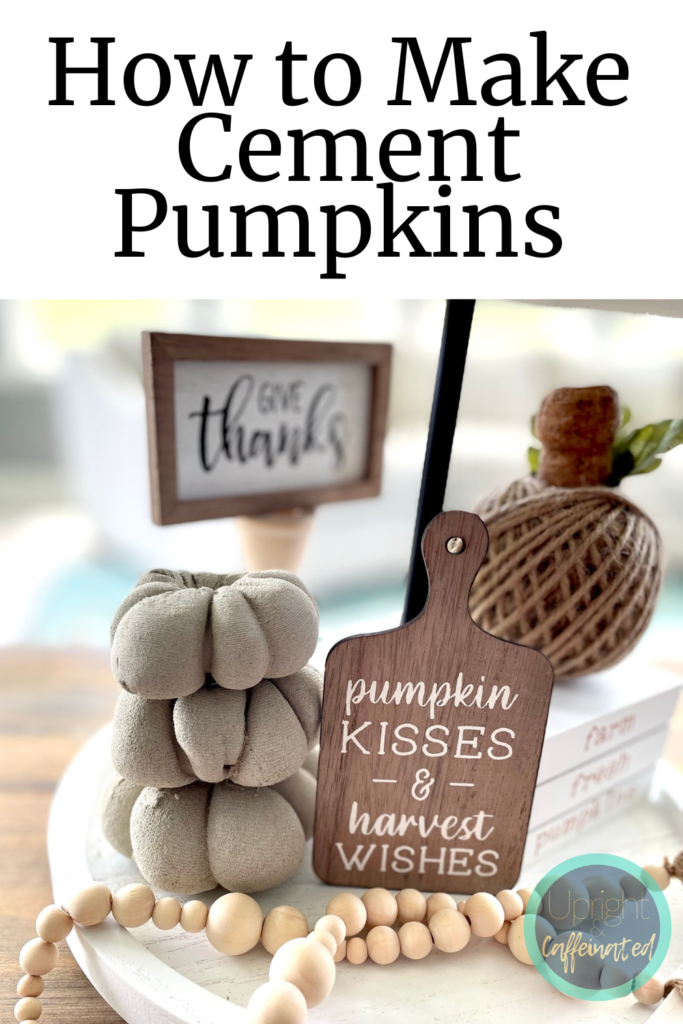
Looking for a fall craft project? These cement pumpkins are easy to make and look fabulous when added to your autumn decor. Keep on reading to learn how to make them at home.
I’ve seen cement pumpkins on Pinterest, and read a few tutorials that seemed to complicate the process. I decided to make these using rubber bands and panty hose and they turned out PERFECTLY!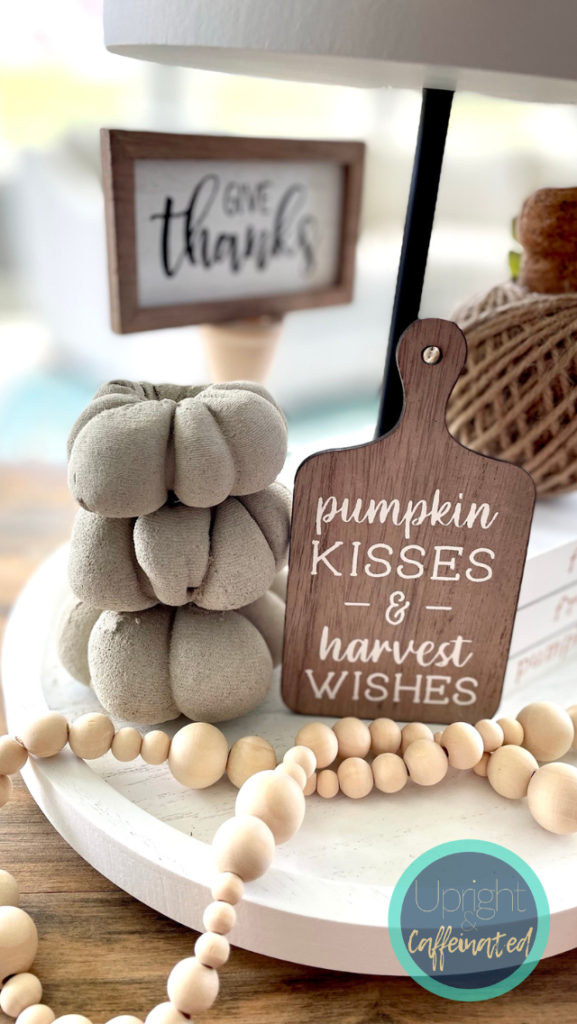
Here’s What You Need
Panty hose
Rubber bands
Bucket
Cement
Water
Plastic fork
Plastic wrap
Scissors
Disposable cup
This post includes affiliate links to products. I may receive a commission if products are purchased through the provided links. My full disclosure statement can be found here.

A few things to note before getting started.
- Use quick dry cement or Quickcrete
- This project is easy but MESSY. I would suggest making these outside.
- You’ll need to mix a new batch of cement for each pumpkin. Don’t try to mix a big batch and then make multiple pumpkins- the cement will dry and you won’t get good results
Let’s jump into to how to make cement pumpkins.
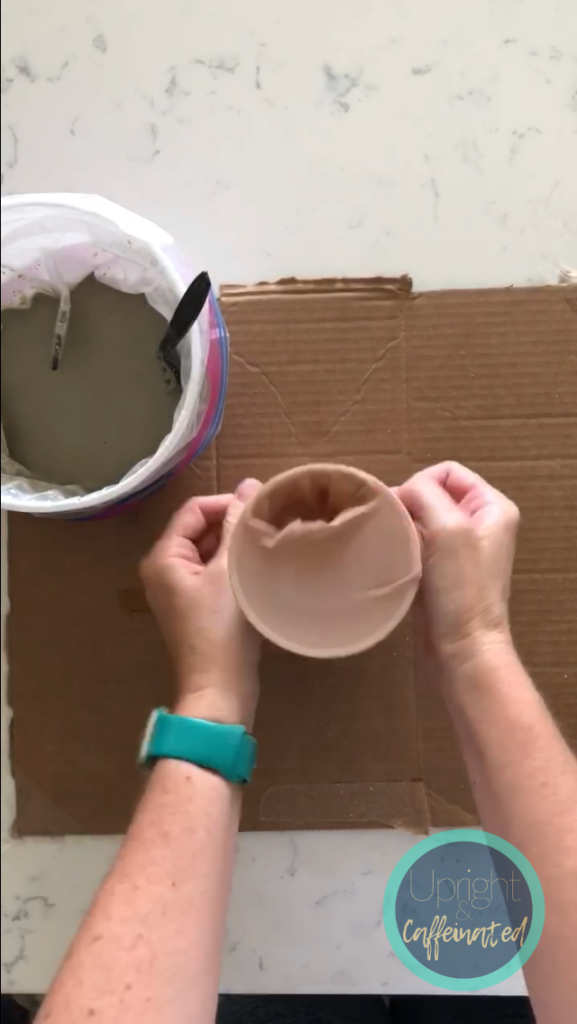
First- cut the foot part of the panty hose. And place it into the disposable cup, folding down the open end around the top of the cup.
Mix the cement and water according to the directions on the bag of cement. I started with about 2 cups of cement and then added the water.
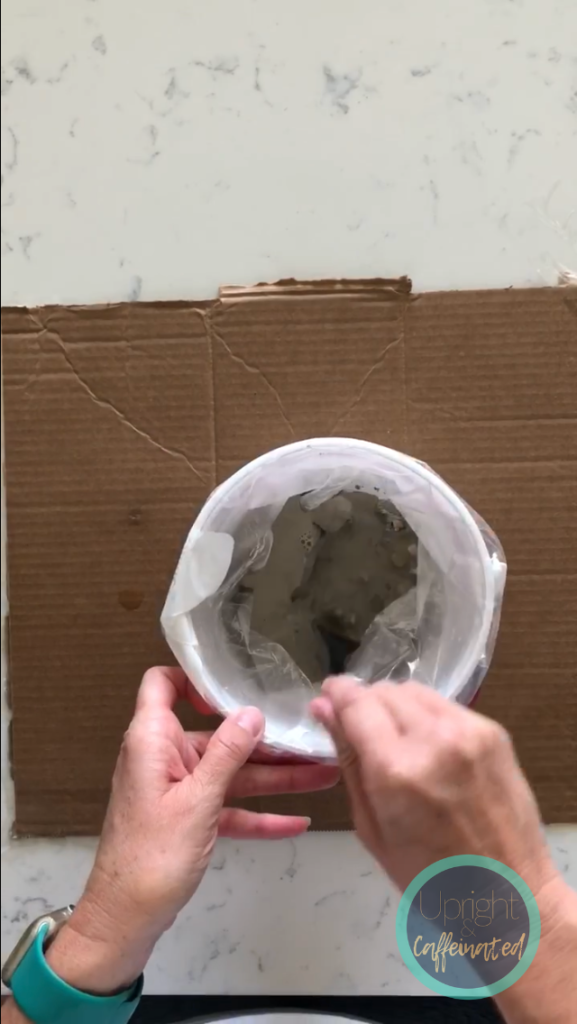
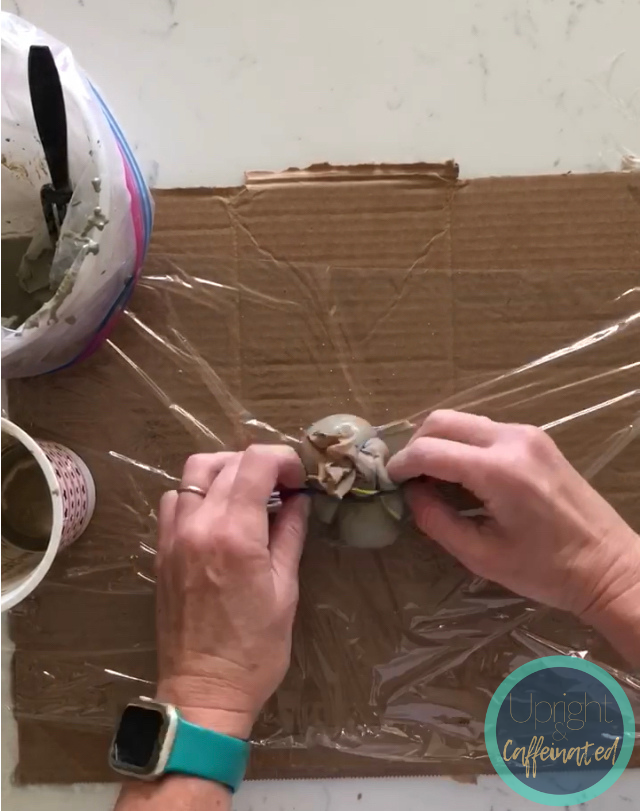
Pour the cement into the panty hose and then lift the panty hose out of the disposable cup and tie off the top of the panty hose. Next, place the panty hose onto the plastic wrap-this will “flatten” the pumpkin to make it more of a “Cinderella pumpkin “.
Next, apply the rubber bands around the panty hose. I used 4-5 rubber bands for each pumpkin.
Place the pumpkins outside to dry. And allow them to dry for one hour.
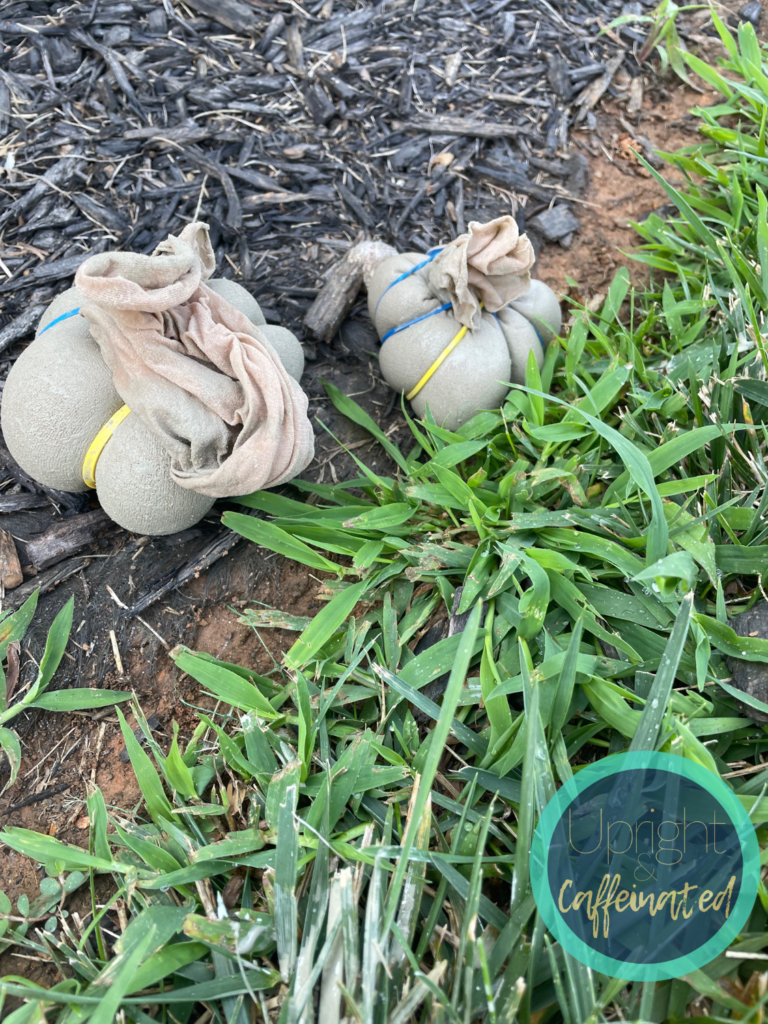
Since you are using quick dry concrete, these will dry surprisingly fast! You don’t want to wait too long because you want to make sure you can still remove the rubber bands and panty hose.
Use scissors to cut the rubber bands and panty hose and then peel off the pantyhose from the cement pumpkins.

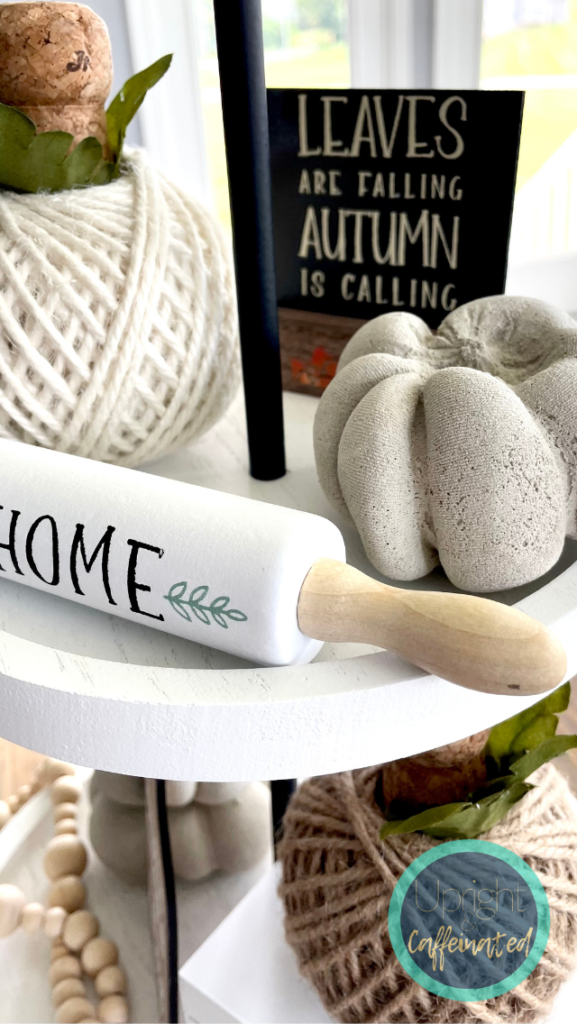
That’s it! I love how these look. The panty hose give the cement a “soft” look and I love the natural color of the cement. If you want to paint these- you absolutely can!
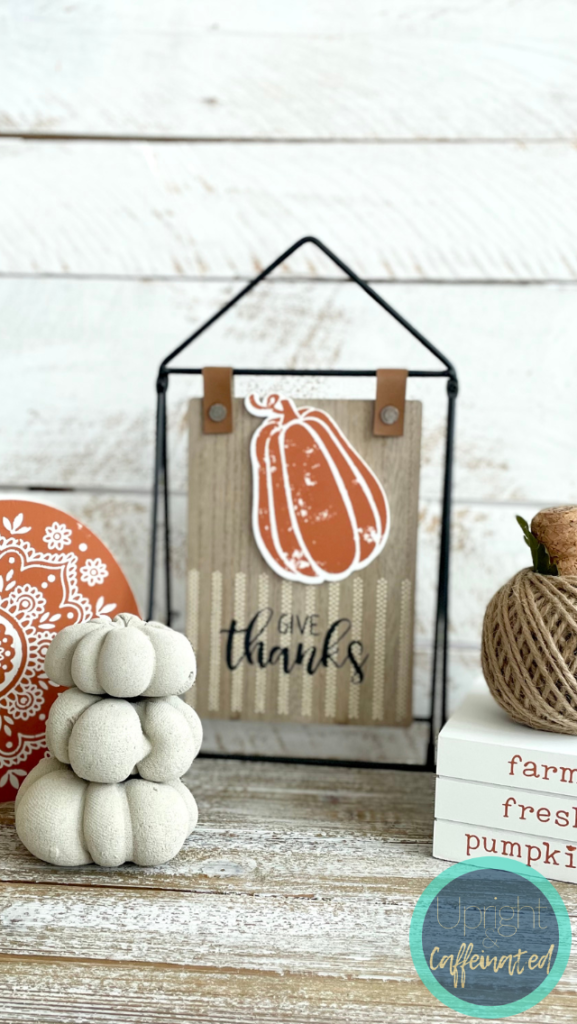
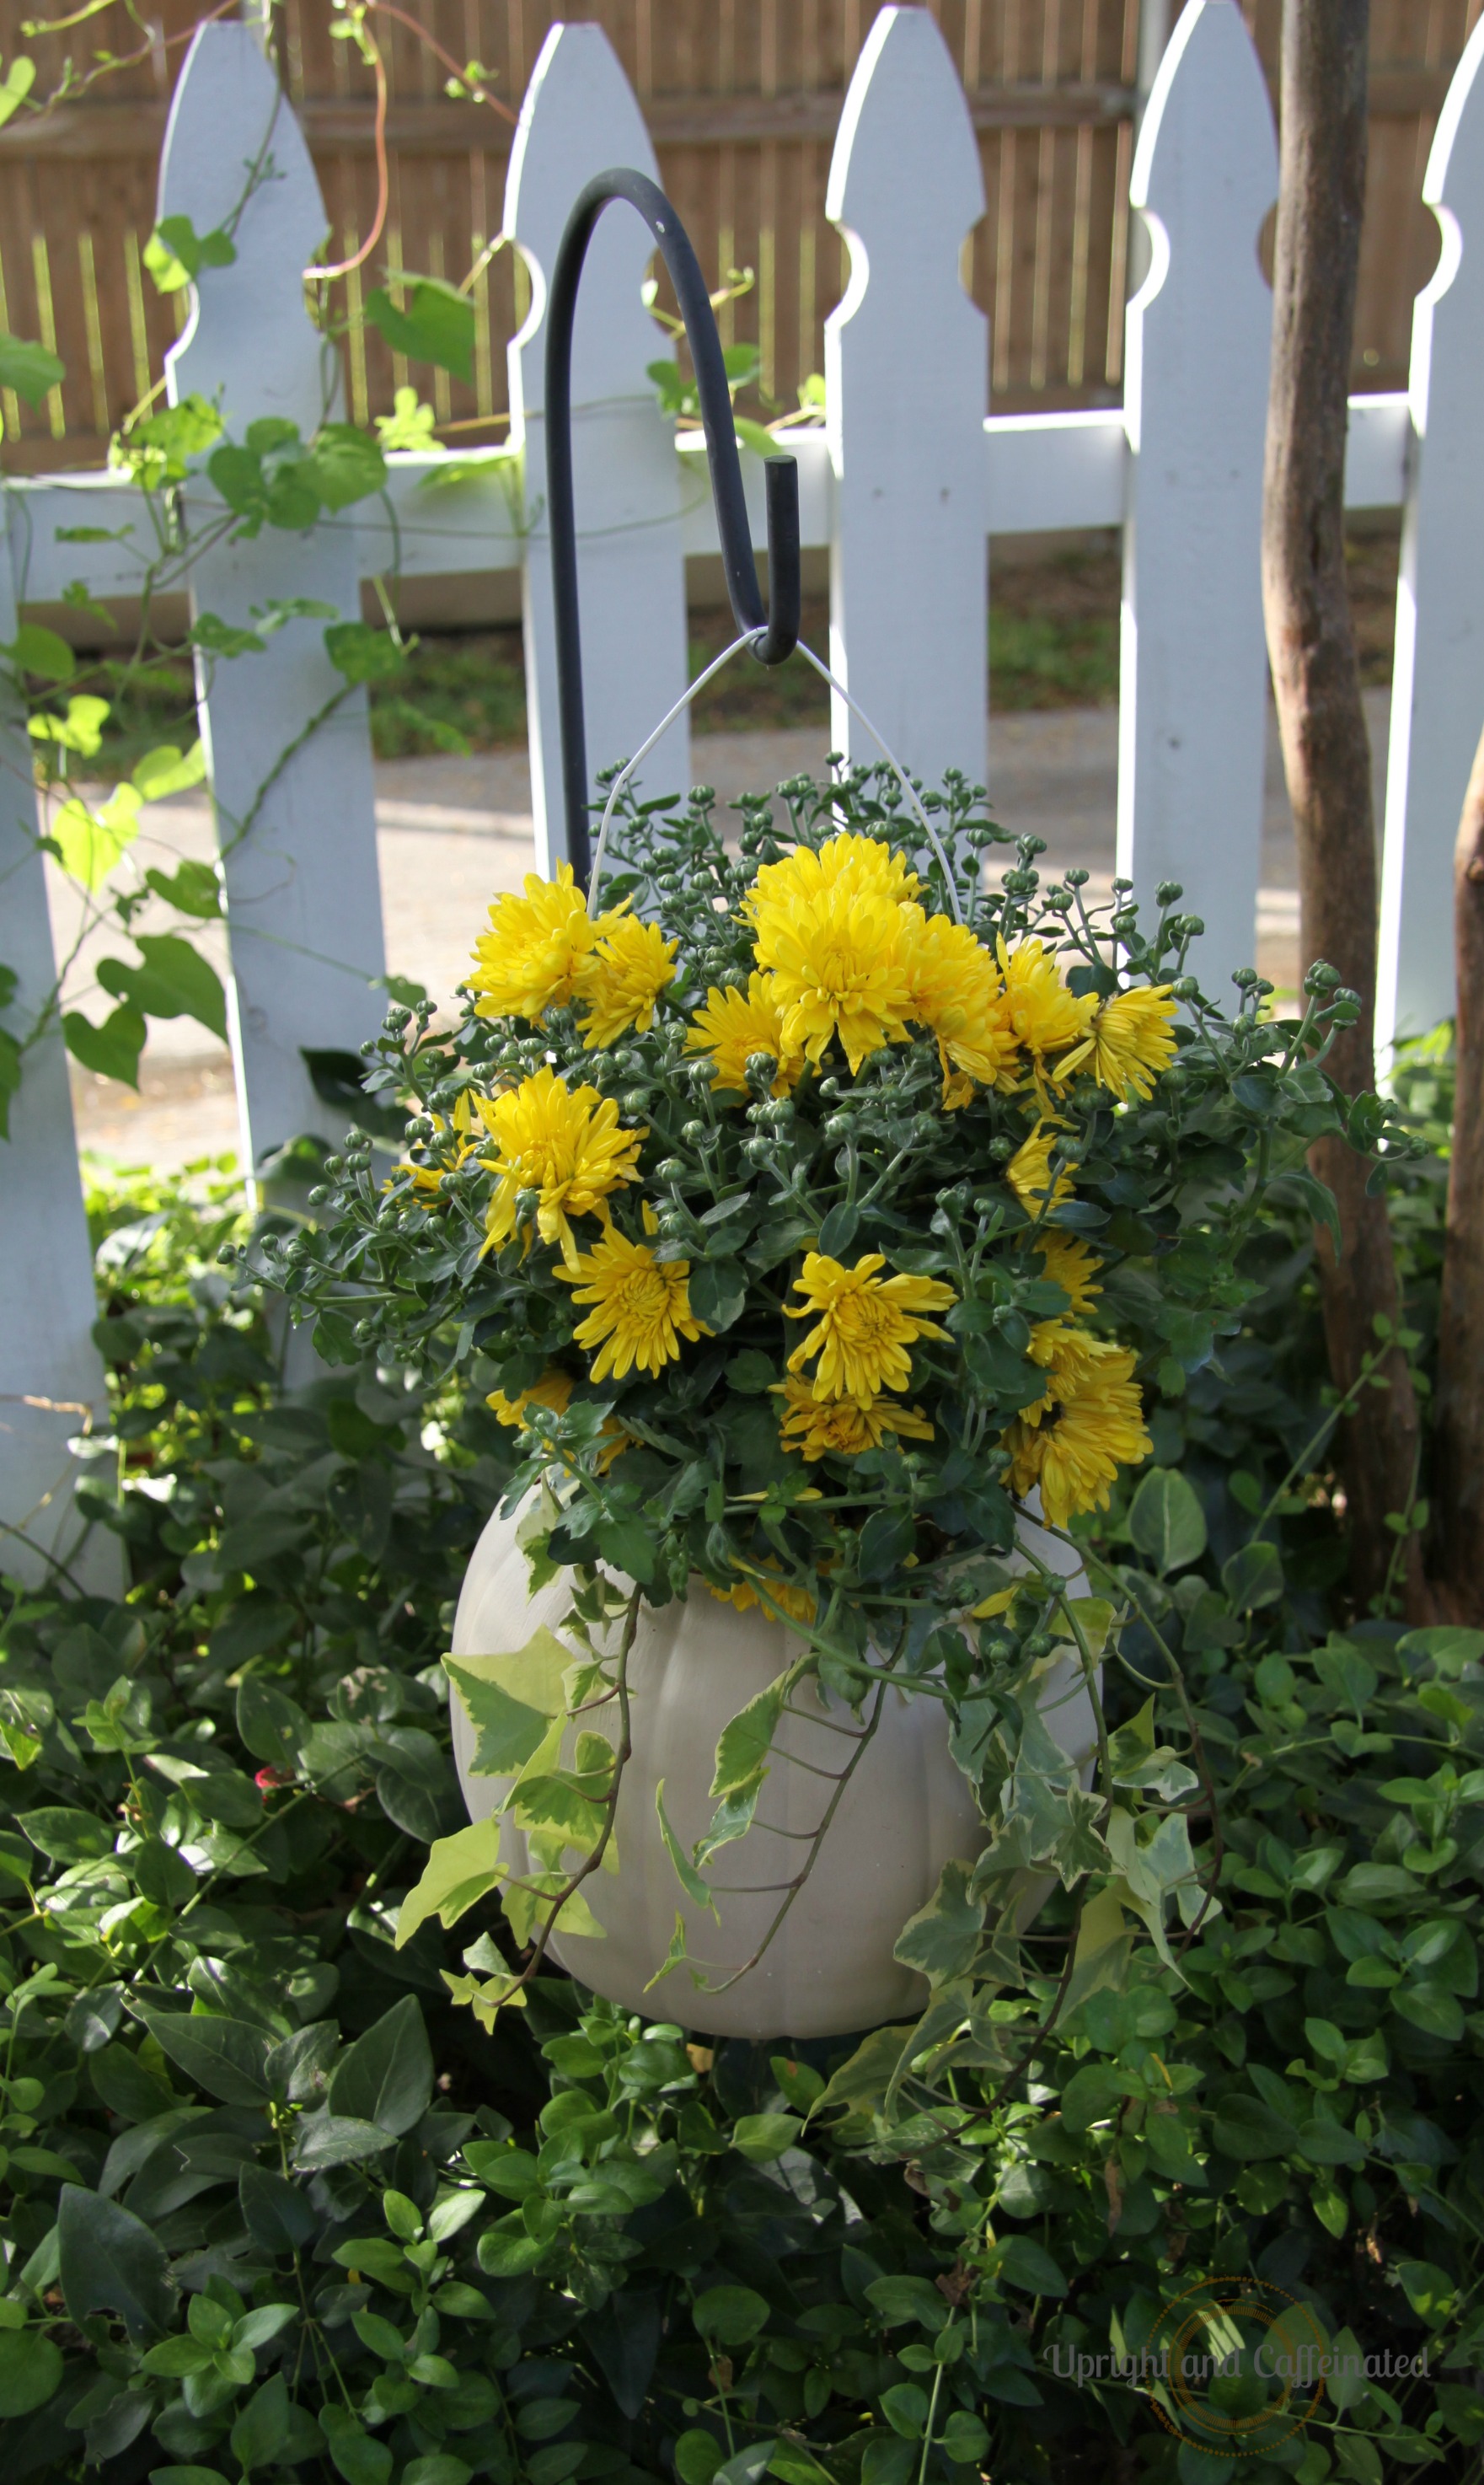
I wanted to stack mine, so I didn’t add a stem, but you could add a stick, wine cork or even pipe cleaners to make a stem for these pumpkins. They look great on a fall tiered tray or on a book shelf with other fall decor pieces.
⇓PIN IT⇓